Friday, June 15, 2012

End Of An Era


When I was 7 years old, in second grade, I had the best teacher.  She inspired me to want to be a teacher when I grew up.  After years of babysitting, working in a before and after school program and summer camps, and being a nanny for a few summers, I graduated and got a job as a kindergarten teacher.  In 2002 My dream had come true.  Through my years of working with kids from ages 3-17, I decided early childhood was where my heard was and I was now going to teach 5 year olds.

I spent only one year at my first school before being involuntary transferred. I interviewed at the job fair and went to another school where I would teach for the next nine years.  I had completed part of my student teaching at Ronald McNair Elementary and was now going to be teaching there with my mentor.  Three years later, my mentor decided to move on to another school after 16 years at McNair.  So I decided that I too needed a change and requested to move up to first grade where I would spend the next six years. 

Over the course of those six years, the first grade team changed a few times.  We acquired teachers new to our school and teachers that moved down to first grade from other grade levels.  A new special education teacher came on board and I was so lucky to get to work with her for two years.  Our students made such great gains and it was because of her and our collaboration with each other and our paraeducators.

In April of this year I had my second child, a little sister for our big boy.  Another dream of mine was about to come true.  Not only had I always aspired to be a teacher, but also a mom.  Now, I was already a mom, but I wanted nothing more than to stay home with my kids.  And now that dream has become a reality.  Today, I packed up my classroom at McNair, which has been my home away from home for 10 months out of the year for the past nine years.

Goodbye McNair and all of my coworkers and former students.  You have been such a big part of my life.  But it’s time to say goodbye and to move on to the next chapter: SAHM.
My empty room.
My reasons for leaving.

Thursday, March 8, 2012

Reasons For My Blog


I started my blog in 2010 when Derek was almost 18 months old.  There are a few reasons why I started it:

  1. To record his development.
  2. To record all of the things we are doing now that we have a child.
  3. To share ideas with friends.
  4. To share how my life and priorities have changed since becoming a mom.

My opinions are my own.  This blog is a record of my personal journey as a mom and homemaker and how my career as a teacher plays a part in all of this.  I look forward to continuing to share Derek’s growth and development as well as his sister’s when she arrives in May. 

Priorities have changed even more now that we are expecting a second child.  BIG decisions have already been made and will be executed within the next few months.  Stay tuned to see what comes next…

Tuesday, February 21, 2012

Sculptures In a Bag

The final product...Derek's "rocks".

I was looking for something different to do with Derek besides the usual watercolor, markers, and painting wooden frames etc.  I came across an idea to make a sculpture.

Materials:
1 cup of Plaster of Paris
½ cup of water
Ziploc bags
Paint

Add 1 cup of Plaster of Paris and ½ cup or water to a Ziploc bag. 
(**I found that using 1/2 cup of Plaster of Paris and 1/4 cup of water worked better)
Seal, letting out as much air as possible.
Double bag it (just in case!).


Now let your child squish and squeeze it.  In 10-15 minutes it will get warm and start to harden.  (**The original idea said it would only take a few minutes, I found that it took longer and Derek got bored.  He could have also been bored because he was tired.)


Once it has hardened, you can remove the bags and they are ready to paint.  (**I removed the bags over a trash can as there was some crumbling.  I also let them dry a bit longer before painting them.  They felt a little wet when I removed the bags.)


Finally, I got out the paints and Derek painted his “rocks” (as he calls them).

Monday, February 13, 2012

"Hand"-made Valentine's Day


I feel it is important for Derek to give hand-made gifts, especially at his age. They are more appreciated than something that I inevitably picked out at the store and signed his name to.  While Bryan and I don’t make it a habit to actually celebrate Valentine’s Day, we still want Derek to know it is a day to celebrate friendship and love.  So we went to work on his Valentine’s!
The main gift was a handprint heart that he made using a pink and a red handprint.  This of course required help from Mommy.  (idea from pinterest)  
Final Product

Messy Hands!!!


He also made cards for everyone in the family and his daycare teacher.  He used foam stickers and markers.  When working with the stickers, he wanted to know what all of the words said and he made sure that he put all of the purple hearts on Mommy’s card since he knows it’s my favorite color.


I made bookmarks for the students in my class. I used paint swatches and stamped a heart in each block, then attached a ribbon to the top.  The original design called for a heart shaped punch but I couldn’t find mine. (idea also from pinterest)


My final project for this weekend was actually the first one I made.  Our anniversary was February 10.  We celebrated 11 years together. Bryan loves martinis and olives so I saw this idea in a magazine for this card and decided it was perfect to make for this occasion.


Tuesday, January 24, 2012

A Homemade Christmas

With a growing family and a budget to stick to, Christmas 2011 had a focus on homemade gifts.  On Christmas Eve my fathers’ side of the family gets together. I always like to give a little something to my aunts and my sister.  This year I went completely homemade.

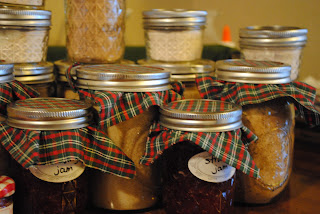
I made gifts boxes for each of them.  Some of the items I made include strawberry jam, hot mocha drink mix, hot pink drink mix, lemonade iced tea mix, and candles made in an old miniature jelly jar.  I also included Derek in the homemade gift project.  He made travel mugs and apple-cinnamon ornaments.  The items were put together in gift boxes I got from the Target dollar bins.
                                                                      My finished jars
                                 Candles made in jelly jars (the scents match the flavor on the jar)
                                                                Jam and Drink Mixes
                                              Derek working on his apple-cinnamon ornaments
                                                          Ready to bake the ornaments!
Finished gift box for my sister (Aunt Momma as Derek calls her).  Includes a travel mug and ornament made by Derek as well as a jar of Hot Mocha mix and Pink Drink mix.

The main gift I made for my parents and my sister was a joint effort between Bryan and myself.  I had this idea that I saw in a magazine to make a large letter depicting a last name.  This could be hung inside or outside.  So that I did not have to enlarge a letter and cut it out of wood myself, I searched several craft stores to find what I wanted.  JoAnn Fabrics had letters that were large enough to use for this project.  I got a D for my sister and an H for my parents.  The next step was to do the decorating.  Bryan helped me by cutting wooden dowels that had varying thicknesses.  He cut them into different lengths so that they would be varied on the letter.  After he was finished, he sanded the edges and I glued them onto the large letter.  The final project was sprayed with polyurethane so that it would be safe if it were to be hung outside.


This was a very rewarding way to give gifts this year and I already have a plan for Christmas 2012!

Monday, August 15, 2011

Breakfast Freezer Meals


Well, summer break is quickly ending which means I will be returning to work after a glorious nine weeks at home with my 2 year old.  The beginning of the school year is always a challenge from setting up the classroom, meetings, and just the all around balancing work and home life routine.  In 2009 when I was preparing to return to work from an extended summer break that included maternity leave, I had an idea to freeze several meals that would help make the transition easier.  I certainly did not have enough meals in the freezer for every night, but it at least covered some of the nights and gave me less to think about when I was adjusting to being a new working mom.  Planning my weekly dinners ahead of time helped as well and I still do this.  I may not “stick” to the exact plan, but I at least have an idea of 6 dinners for the week (we allow one night for eating out/carry out).  Since then, I have tried to “stock up” on home made frozen dinners when I can.

I am talking about making dinners but the title of this blog is BREAKFAST Freezer Meals.  Well, I thought, if I can do this for dinner, why not breakfast?  Derek loves sweet potato pancakes.  I had already been making large batches of mini pancakes and freezing them in small portions for him.  What about for Mommy and Daddy?  It’s challenging to make eggs before heading off to work so typically cereal, a bagel, or a protein bar (in my case) would be the breakfast option.  Now there are more options!

Whole-Grain Waffles

one batch of waffles and 3 batches of mix for the freezer

This recipe made a big batch of dry mix that can be frozen up to 6 months.  I froze it in 2 cup portions.  2 cups of dry mix plus a few wet ingredients makes about 5 waffles.  I made one batch of 5 waffles to freeze.  They can be popped into the toaster!  Add blueberries or whatever you like to the batch before cooking them up!

mix together:
4c whole wheat flour
2c all-purpose flour
1c toasted wheat germ
1c toasted oat bran
1 c buttermilk blend powder (found where powdered milk is)
3 tbs baking powder
2 tsp baking soda
1 tsp salt

This makes about 8 1/2 cups and can be frozen in a Ziplock bag up to 6 months. I froze it in 2+ cup portions with the instructions on the bag. (4 batches)

To make waffles (about 5/batch):
2 c of mix
2 eggs
1 cup water
2 tbs canola oil
2 tbs honey (**do not use honey of making for a child under 1 yr old)

Ham, Cheese, and Egg Burritos on Whole Wheat Tortillas

all wrapped up for the freezer!
(can be frozen up to one month)
You could add any breakfast meat or even veggies!

Sunday, July 31, 2011

Cook Once; Eat Twice


This summer I have been doing a lot of cooking.  I have tried out many new recipes in addition to my old favorites.  A lot of my cooking this summer has been from my Best Ever Greek cookbook.  I got this book for $3.99 at Marshalls.  What a great deal!  I have used it so many times already and have many more recipes to try.

The other night I made three things from this book. These recipes sound a lot more complicated than they actually are to make. The time it takes to wait for everything to marinate is what makes it so time consuming.

Chicken kabobs with yogurt sauce
  1. To make the sauce: 1 ¼ cups of Greek yogurt (I use Chobani); 2 crushed cloves of garlic; juice of ½ lemon; 1 tbsp of fresh herbs (oregano, dill, tarragon, or parsley; I used dill); salt and pepper.  Put in a large bowl and mix together.
  2. Cut chicken breasts into chunks about 1 ½ inches square. (recipe calls for 4 chicken breasts, I used 2 and still had leftovers).  Add to the yogurt mixture and toss well.  Cover and leave to marinate for 1 hour in the refrigerator. 
  3. Meanwhile, if you are using wooden skewers, make sure they soak for 30 minutes prior to use.  Or you can use flat, metal skewers.  You could even use rosemary sprigs.
  4. Preheat the broiler.  Thread the chicken onto the skewers (grease the skewers if using metal.)  Place kabobs on a greased broiler pan.
  5. Cook under the broiler for about 15 minutes, turning and basting with remaining marinade as needed.
  6. Pour the remaining marinate into a pan and heat gently but do not boil. (I found that there was not much leftover and I only used 2 chicken breasts!)
  7. Serving suggestion: on shredded lettuce on a bed of rice and garnished with lemon slices. (and yogurt sauce)

Zucchini slices

  1. Heat some olive oil in a pan.
  2. Slice baby zucchini into ¼ inch strips. (I used regular sized zucchini-that’s what I had)
  3. Coat the slices in flour and fry 5-10 minutes.
  4. When finished, season with salt and pepper.

Carrots a la grecque

  1. Cut one pound of carrots into fingers, the thickness of fries. (I used baby carrots, that’s what I had)
  2. Put in a large pan with 1 ¾ cups of dry white wine, 1 tbsp Greek honey (I used what I had), 2 sprigs of thyme, 6 sprigs of parsley, 1 bay leaf, 2 cloves of garlic, chopped; 1 tbsp crushed coriander seeds
  3. Bring to a boil, then simmer, uncovered, about 20 minutes, or until tender.
  4. Use a slotted spoon to transfer carrots to a serving dish.  Return cooking liquid to a boil and boil until it is reduced by half.
  5. Strain the liquid over the carrots and let cool.  Then chill in the refrigerator 3-4 hours.
  6. Serve at room temperature and garnish with fresh herbs.

There was plenty of leftover chicken so I used it to make another recipe that I found in Taste Of Home magazine (March 2011).  We had this for lunch with a side of pasta salad.

California Chicken Wraps
Spread hummus (I used garlic hummus) on a whole wheat tortilla, top with cubed chicken, chopped roasted red peppers, feta cheese, thinly sliced fresh basil.  Roll it up.
Putting it all together.

All rolled up with a side of pasta salad! Yum!